Custom Reporting for EU Policy
During my time at Politics, I was tasked with designing and implementing a new report generation feature for the regulatory monitoring platform. Due to a Non-Disclosure Agreement (NDA), the content shared here is fictional to maintain the app's confidentiality.
This case study highlights my design approach and problem-solving process, illustrating how a feature is ideated, iterated, and refined over time in an Agile environment.
User Story
The process began with receiving and analyzing a user story provided by the Sales team. This story outlined the need for a report generation feature, which served as the foundation for my design approach
Design Thinking
I conducted internal research to understand the need, which I then translated into a clear opportunity. I sketched potential solutions, refining them through an iterative process with regular feedback and reviews.
Delivery
The final concept was transformed into a high-fidelity prototype using Figma, adhering to the style guidelines established by our Design System
Iterations
As development progressed, the feature went through numerous iterations. This continuous feedback loop allowed us to refine and expand the functionality, ensuring it evolved in line with user needs.
Introduction to the Platform
Before diving into the user story, it’s important to introduce the concept behind our app. Politics is an EU regulatory monitoring platform designed to help professionals and companies track the development of EU procedures. It enables users to engage with key stakeholders during the legislative process, monitor competitors and policymakers, and facilitates collaboration within teams and with clients.
The User Story
Empathy
My initial step when embarking on a new project involves understanding the topic by considering the user's perspective, stakeholder input, marketing and business requirements, and all the elements needed to become an expert in the field. In other words, I began to empathize with the user's needs. Insights were gathered through interviews with colleagues, who served as a bridge to the clients, and discussions with the backend team, providing technical insights on the data structure.
Given the complexity of the EU regulatory landscape, where data is critical, designing functionalities that make this data accessible and actionable is essential. Therefore, continuous collaboration with developers is crucial. After gathering the necessary information and organizing it on a whiteboard, I created a data mapping framework that prioritized the elements users would most likely want to export in their reports.
Due to NDA constraints, I won't delve into the specifics, but for this case study, it’s sufficient to understand the elements included in Politics. As a monitoring platform for EU regulations, users can access files and information involved in legislative processes, and a tagging functionality allows them to organize and monitor these important elements.
Here are the key elements that users can tag:
Procedures
Consultations
Documents
People
Organizations
News
The data mapping was based on analysing these different "atoms", highlighting the elements users require to export.
Idea and User Flow
With foundational knowledge in place, the ideation process began, leading to the creation of a user flow. The goal was to establish a dedicated space in the platform where users could produce customizable reports by following a simple, step-by-step process. These steps aim for simplicity and clarity in the user experience, breaking down necessary actions to reduce cognitive load.
When tackling complex features like this, I typically consider the broader picture, evaluating how the design could evolve to meet users' needs. Once this comprehensive vision was established, I broke down the idea into actionable tasks and prepared the materials for the first Agile sprint. Below is the user flow used for the initial delivery.


Wireframes and Reviews
The flow was then translated into 5 initial steps:
Tag selection
Category selection
Customisation
Report structure
Report generation
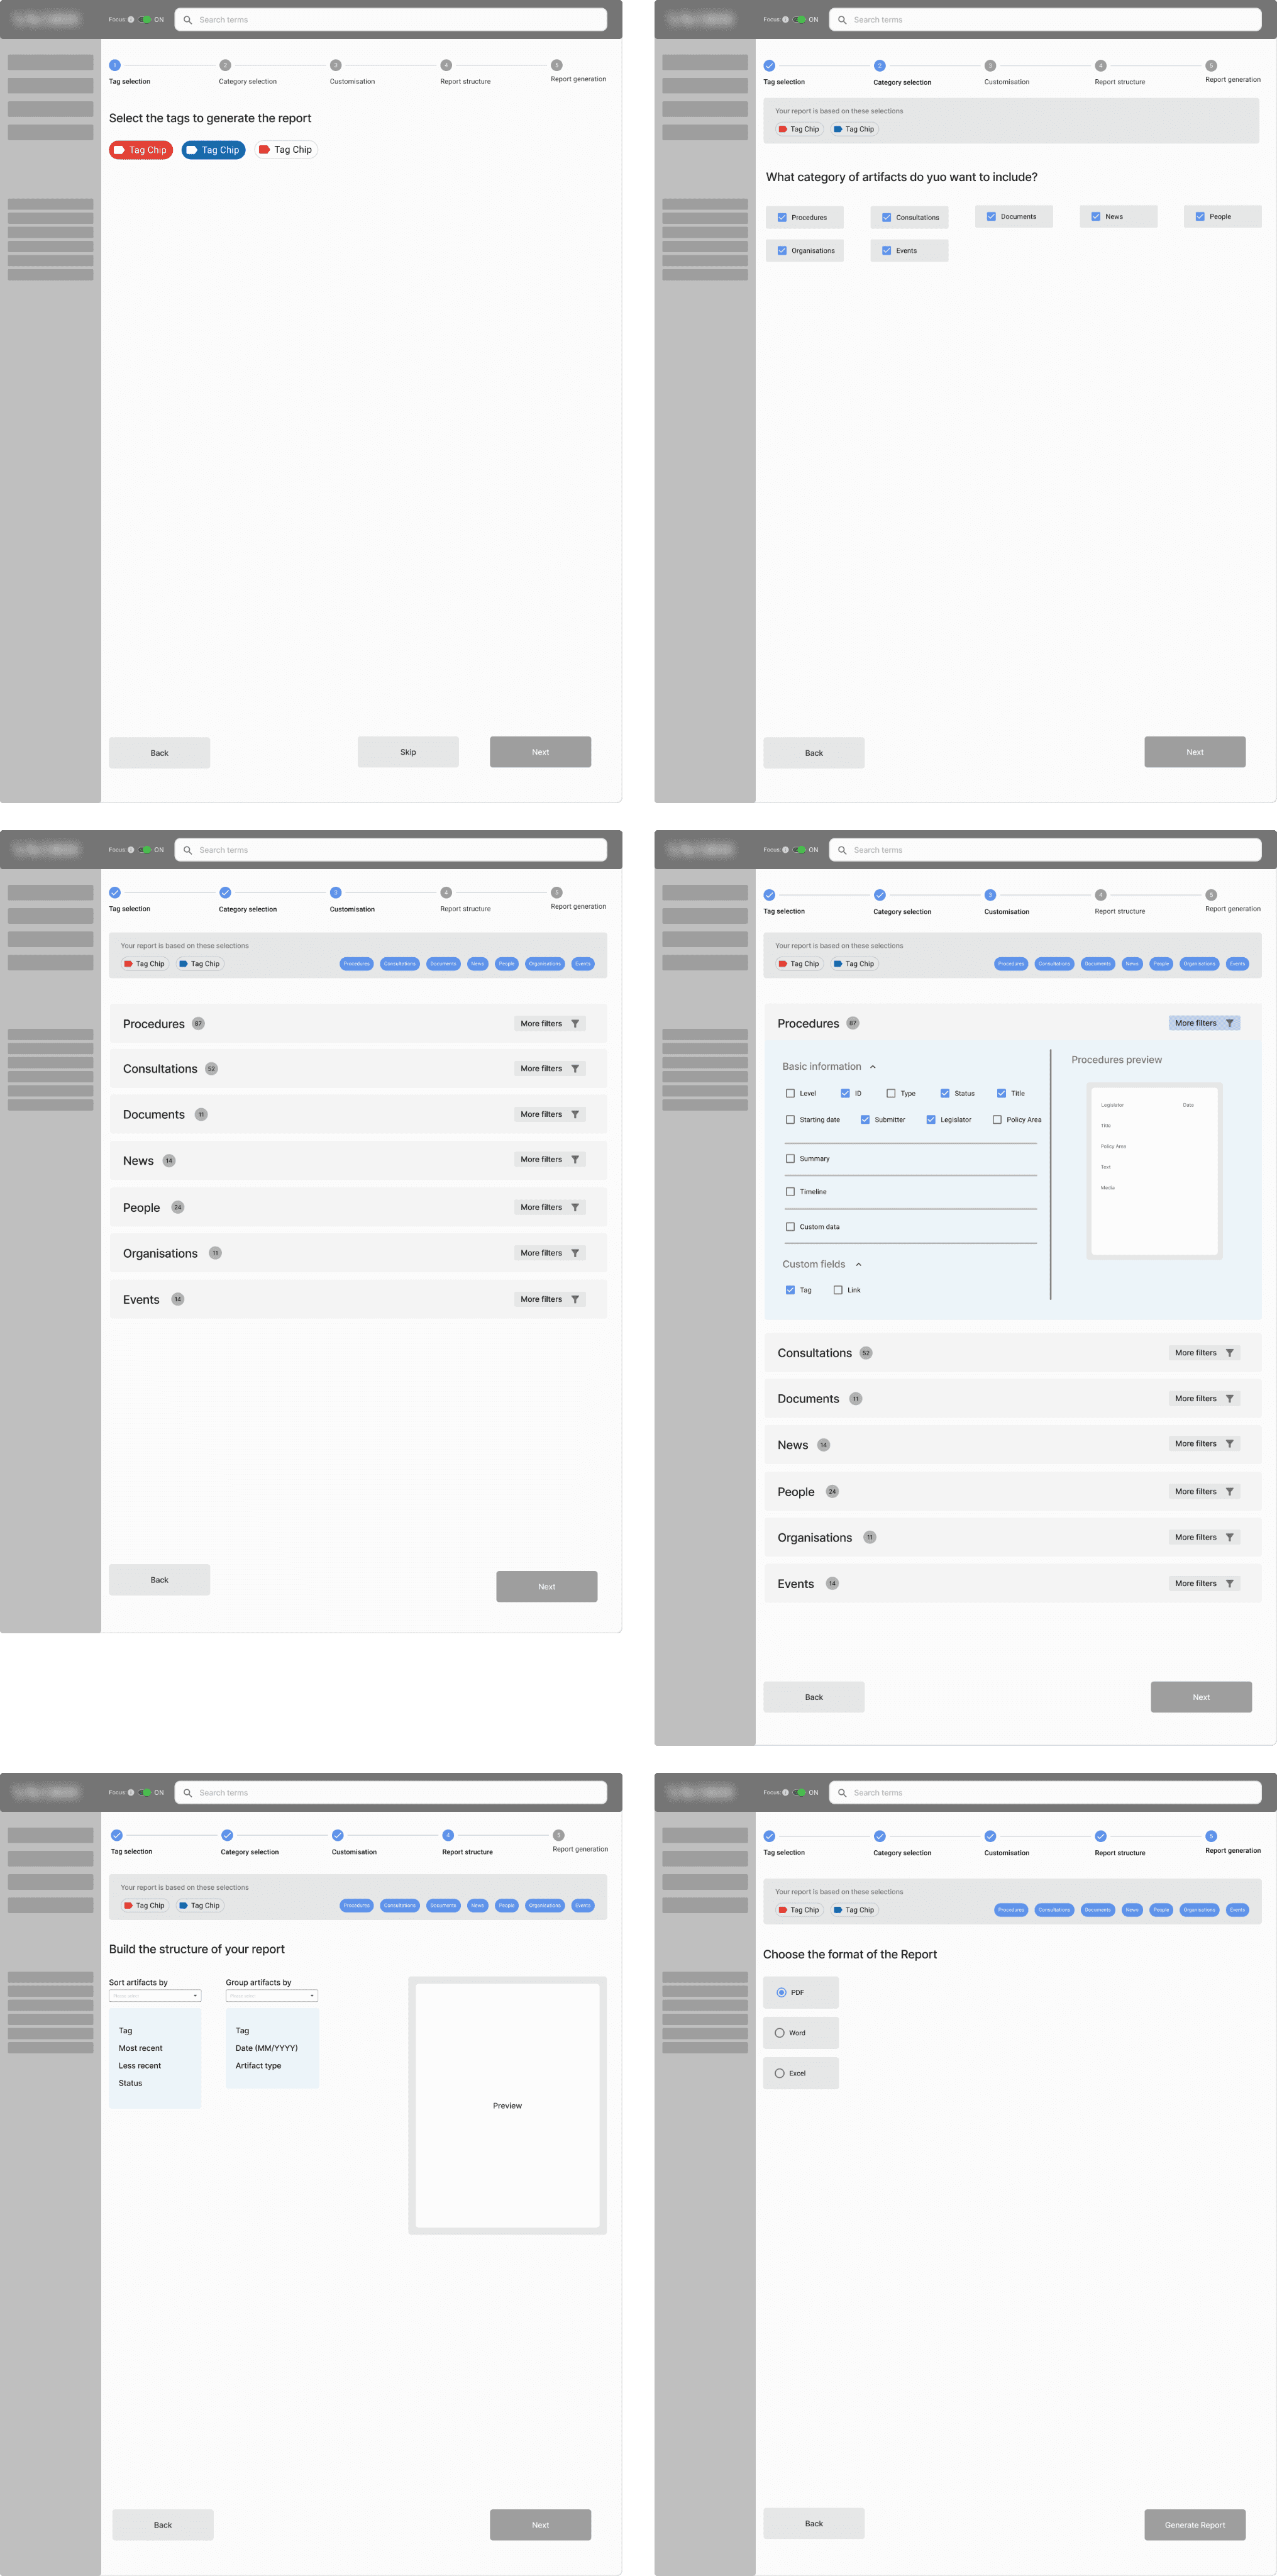
The steps took shape as graphical representations, evolving after a series of reviews and feedback from key stakeholders. Following several iterations, the concept was fine-tuned, resulting in the final wireframe version shown below.

Design System and UI
I began working on the high-fidelity design by first assessing the app's existing elements, particularly its visual style. The starting point was our internal Design System, built on Material UI. In addition to foundational aspects like colors and fonts, I identified reusable components and common patterns already in use across other pages to ensure consistency throughout the platform.
The initial wireframe was then transformed and adjusted to align with these standards. After some refinements, we arrived at the final version, ready for handoff.


New iterations
User Flow re-design
For the visual report, the goal was to present the same data as the printable version, but through an interactive online graph. I started by reviewing the existing user flow and rethinking the structure to accommodate the generation of visual reports. The idea was to create dynamic steps—meaning the process would adapt based on the user's choices. This way, users could determine the type of report they wanted to generate, with a seamless experience regardless of format. The final solution offers two main pathways: one for document-based reports and another for online visual reports.


Main Differences
In line with the two pathways, several new details have been introduced, and I'd like to highlight the key distinctions:
When creating a visual report, users are required to select only specific categories, such as "procedures" and "consultations."
To enhance data readability in the visual report, two thresholds have been established. If users select more than 36 items, a warning message prompts them to make a mindful selection. Should the user exceed 40 items, an error message appears to prevent the final graph from becoming unreadable.
Customization options differ based on the selected report format. As a result, the displayable elements in the customization step are adjusted according to the chosen pathway.
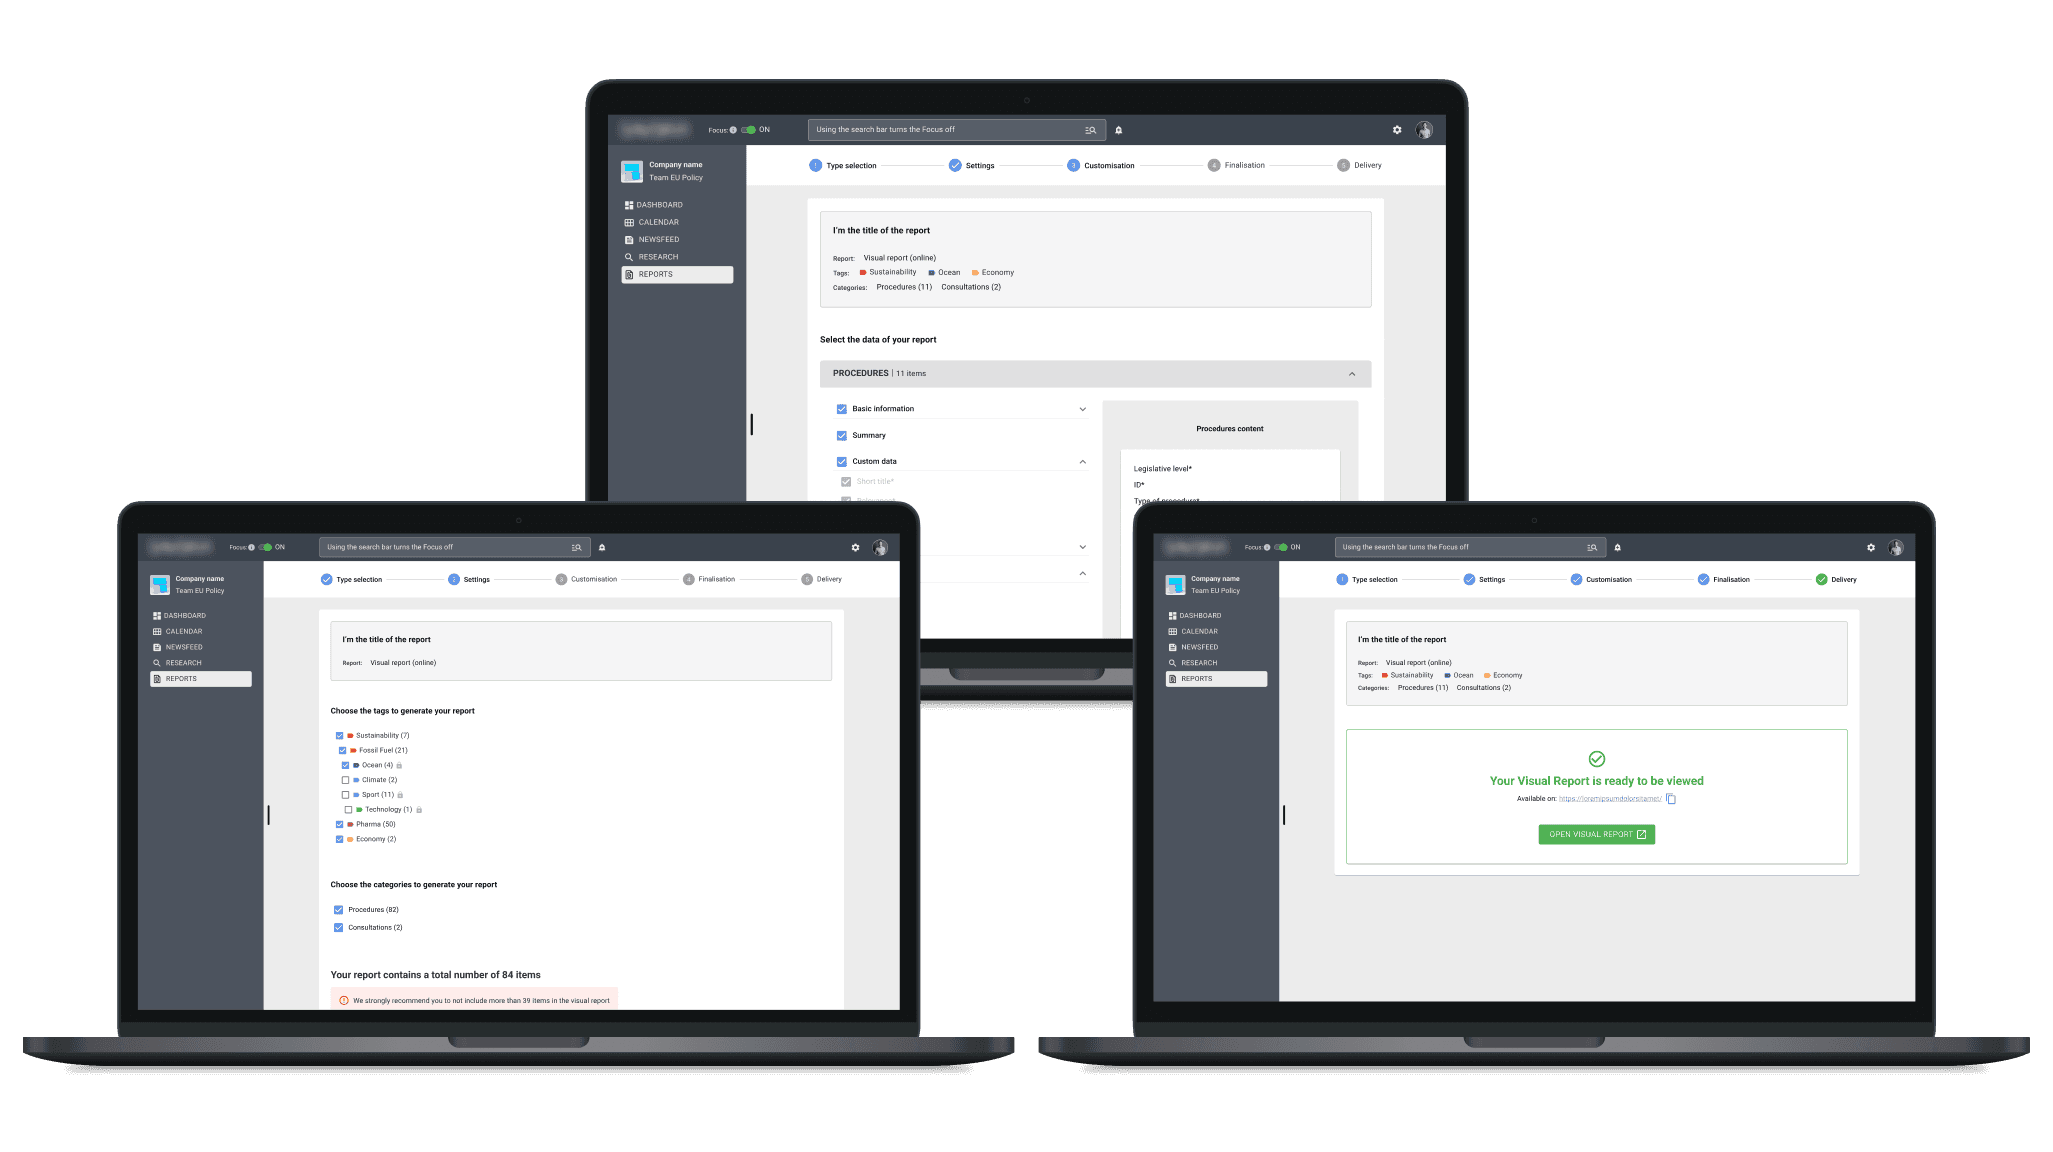
The final delivery
After outlining the functionality, I created a low-fidelity prototype, which was then refined into a high-fidelity version.
For brevity and clarity, the following high-fidelity prototype illustrates the flow for generating visual reports and the resulting visual data representation.

